Introduction
Upgrade Oracle Database is a crucial step to ensure you're benefiting from the latest features, performance enhancements, and security updates. In this guide, we'll walk you through the process of upgrading your Oracle Database 12c to the latest version, 19c.
Follow these steps to ensure a smooth and successful upgrade
Environment
| Hostname | : prod.infoinflux.com |
| Database Name | : PROD |
| DB VERSION | : 12.2.0.1.0 |
| ORACLE_BASE | : /u01/app/oracle |
| DB Home Path | : /u01/app/oracle/product/12.2.0.1/db_1 |
| Datafile Location | : /u01/app/oracle/oradata/PROD |
| Target DB VERSION | : 19.0.0.0 |
| Target DB Path | : /u01/app/oracle/product/19c/db_1 |
| Upgrade Method | : Database Upgrade Assistant |
Steps For upgrade using Database Upgrade Assistant (DBUA):
- Take Latest Database backup
- Make Directory for 19c Home
- Download and Unzip Software to 19c Home Directory
- Install 19c Binary or Software
- Create Pre and Post Upgrade Scripts
- Run Pre-Upgrade Script
- Pre-Upgrade Prerequisites & create guarantee restore Point
- Upgrade Database with Database Upgrade Assistant(DBUA)
- Validate Upgrade & Run Post-upgrade Script
- Drop Restore Point & Change Compatible Parameter
1. Take Latest Database backup
Create Directory for Keeping backup Files: mkdir -p /u01/db_backup/PROD/Other_Files
RMAN BACKUP Location: /u01/db_backup/PROD/
RMAN Backup Taken through Below Script
========================================

run {
allocate channel ch1 device type disk;
allocate channel ch2 device type disk;
backup database format '/u01/db_backup/PROD/PROD_%d_%U_DB.bkp';
sql 'alter system archive log current';
backup archivelog all format '/u01/db_backup/PROD/PROD_%d_%U_ArchiveLog.bkp';
backup current controlfile format '/u01/db_backup/PROD/PROD_%d_ControlFile.bkp';
release channel ch1;
release channel ch2;
}
Copy below files to separate backup folder:
** tnsnames.ora
** listener.ora
** sqlnet.ora
** pfile and spfile
** orapw file
Above Files Copy Location: /u01/db_backup/PROD/Other_Files
Create PFile and Current Control File on the same location:
##PFile##
=============

SQL> create pfile='/u01/db_backup/PROD/Other_Files/initPROD.ora' from spfile;

File created.


##Control File##
=================

SQL> alter database backup controlfile to trace as '/u01/db_backup/PROD/Other_Files/controlfile.txt';

Database altered.
2. Make Directory for 19c Home
##Make Directories and Give Permissions from Root User##
=================================================

mkdir -p /u01/app/oracle/product/19c/db_1
chown -R oracle:oinstall /u01
chmod -R 775 /u01
3. Download and Unzip Software to 19c Home Directory
Download or copy the 19c Database software from oracle user to any location as per your requirement. In this case it is /u01
Unzip it to 19c home location: /u01/app/oracle/product/19c/db_1
[oracle@prod u01]$ unzip DB_19C.zip -d /u01/app/oracle/product/19c/db_1Note: If you copied or downloaded it from root user then you have need provide chmod 775 DB_19C.zip file and then unzip it from oracle user
4. Install 19c Binary or Software
Run the Installer:
[oracle@prod db_1]$ cd /u01/app/oracle/product/19c/db_1
Then
[oracle@prod db_1]$ ./runInstaller
Launching Oracle Database Setup Wizard...
Follow the Screens below in Slides:
[metaslider id="1611"]Run script from Root user : /u01/app/oracle/product/19c/db_1/root.sh
[root@prod ~]# /u01/app/oracle/product/19c/db_1/root.sh
Performing root user operation.

The following environment variables are set as:
    ORACLE_OWNER= oracle
    ORACLE_HOME=  /u01/app/oracle/product/19c/db_1

Enter the full pathname of the local bin directory: [/usr/local/bin]:
The contents of "dbhome" have not changed. No need to overwrite.
The file "oraenv" already exists in /usr/local/bin.  Overwrite it? (y/n)
[n]:
The file "coraenv" already exists in /usr/local/bin.  Overwrite it? (y/n)
[n]:

Entries will be added to the /etc/oratab file as needed by
Database Configuration Assistant when a database is created
Finished running generic part of root script.
Now product-specific root actions will be performed.
Oracle Trace File Analyzer (TFA - Standalone Mode) is available at :
    /u01/app/oracle/product/19c/db_1/bin/tfactl

Note :
1. tfactl will use TFA Service if that service is running and user has been granted access
2. tfactl will configure TFA Standalone Mode only if user has no access to TFA Service or TFA is not installed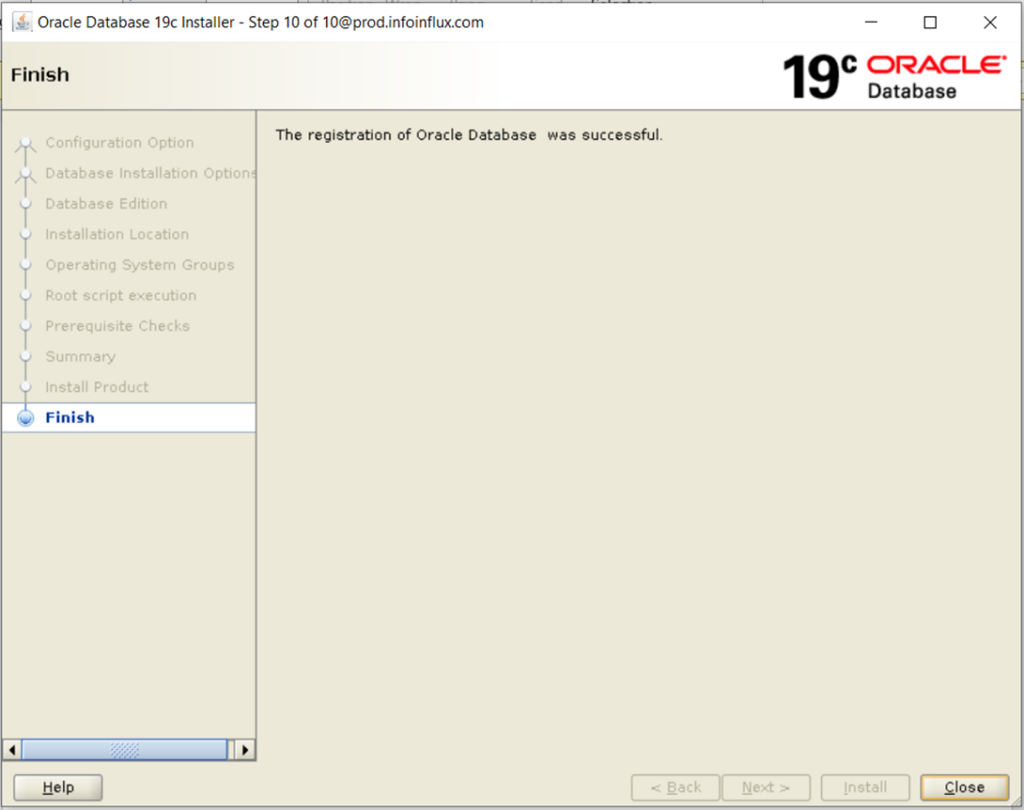
Oracle Database 19c Binary installation completed successfully.
5. Create Pre and Post Upgrade Scripts
Generate Scripts:
Make Directory for Scripts
========================
[oracle@prod ~]$ mkdir -p /home/oracle/preupgrade


Set Environment
==================
[oracle@prod ~]$ . oraenv
ORACLE_SID = [PROD] ? PROD
The Oracle base remains unchanged with value /u01/app/oracle


Create Pre and Post Upgrade Scripts
================================
[oracle@prod ~]$ /u01/app/oracle/product/12.2.0.1/db_1/jdk/bin/java -jar /u01/app/oracle/product/19c/db_1/rdbms/admin/preupgrade.jar FILE DIR /home/oracle/preupgrade
==================
PREUPGRADE SUMMARY
==================
  /home/oracle/preupgrade/preupgrade.log
  /home/oracle/preupgrade/preupgrade_fixups.sql
  /home/oracle/preupgrade/postupgrade_fixups.sql

Execute fixup scripts as indicated below:

Before upgrade:

Log into the database and execute the preupgrade fixups
@/home/oracle/preupgrade/preupgrade_fixups.sql

After the upgrade:

Log into the database and execute the postupgrade fixups
@/home/oracle/preupgrade/postupgrade_fixups.sql

Preupgrade complete: 2023-08-22T20:24:48
View preupgrade.log:
[oracle@prod ~]$ cat /home/oracle/preupgrade/preupgrade.log
Report generated by Oracle Database Pre-Upgrade Information Tool Version
19.0.0.0.0 Build: 1 on 2023-08-22T20:24:47

Upgrade-To version: 19.0.0.0.0

=======================================
Status of the database prior to upgrade
=======================================
      Database Name:  PROD
     Container Name:  PROD
       Container ID:  0
            Version:  12.2.0.1.0
     DB Patch Level:  No Patch Bundle applied
         Compatible:  12.2.0
          Blocksize:  8192
           Platform:  Linux x86 64-bit
      Timezone File:  26
  Database log mode:  ARCHIVELOG
           Readonly:  FALSE
            Edition:  EE

  Oracle Component                       Upgrade Action    Current Status
  ----------------                       --------------    --------------
  Oracle Server                          [to be upgraded]  VALID
  JServer JAVA Virtual Machine           [to be upgraded]  VALID
  Oracle XDK for Java                    [to be upgraded]  VALID
  Real Application Clusters              [to be upgraded]  OPTION OFF
  Oracle Workspace Manager               [to be upgraded]  VALID
  OLAP Analytic Workspace                [to be upgraded]  VALID
  Oracle Label Security                  [to be upgraded]  VALID
  Oracle Database Vault                  [to be upgraded]  VALID
  Oracle Text                            [to be upgraded]  VALID
  Oracle XML Database                    [to be upgraded]  VALID
  Oracle Java Packages                   [to be upgraded]  VALID
  Oracle Multimedia                      [to be upgraded]  VALID
  Oracle Spatial                         [to be upgraded]  VALID
  Oracle OLAP API                        [to be upgraded]  VALID

==============
BEFORE UPGRADE
==============

  REQUIRED ACTIONS
  ================
  None

  RECOMMENDED ACTIONS
  ===================
  1.  (AUTOFIXUP) Gather stale data dictionary statistics prior to database
      upgrade in off-peak time using:

        EXECUTE DBMS_STATS.GATHER_DICTIONARY_STATS;

      Dictionary statistics do not exist or are stale (not up-to-date).

      Dictionary statistics help the Oracle optimizer find efficient SQL
      execution plans and are essential for proper upgrade timing. Oracle
      recommends gathering dictionary statistics in the last 24 hours before
      database upgrade.

      For information on managing optimizer statistics, refer to the 12.2.0.1
      Oracle Database SQL Tuning Guide.

  2.  (AUTOFIXUP) Gather statistics on fixed objects prior the upgrade.

      None of the fixed object tables have had stats collected.

      Gathering statistics on fixed objects, if none have been gathered yet, is
      recommended prior to upgrading.

      For information on managing optimizer statistics, refer to the 12.2.0.1
      Oracle Database SQL Tuning Guide.

  INFORMATION ONLY
  ================
  3.  To help you keep track of your tablespace allocations, the following
      AUTOEXTEND tablespaces are expected to successfully EXTEND during the
      upgrade process.

                                                 Min Size
      Tablespace                        Size     For Upgrade
      ----------                     ----------  -----------
      SYSAUX                             460 MB       500 MB
      SYSTEM                             800 MB       912 MB
      TEMP                                32 MB       150 MB
      UNDOTBS1                            70 MB       439 MB

      Minimum tablespace sizes for upgrade are estimates.

  4.  Check the Oracle Backup and Recovery User's Guide for information on how
      to manage an RMAN recovery catalog schema.

      If you are using a version of the recovery catalog schema that is older
      than that required by the RMAN client version, then you must upgrade the
      catalog schema.

      It is good practice to have the catalog schema the same or higher version
      than the RMAN client version you are using.

  ORACLE GENERATED FIXUP SCRIPT
  =============================
  All of the issues in database PROD
  which are identified above as BEFORE UPGRADE "(AUTOFIXUP)" can be resolved by
  executing the following

    SQL>@/home/oracle/preupgrade/preupgrade_fixups.sql

=============
AFTER UPGRADE
=============

  REQUIRED ACTIONS
  ================
  None

  RECOMMENDED ACTIONS
  ===================
  5.  Upgrade the database time zone file using the DBMS_DST package.

      The database is using time zone file version 26 and the target 19 release
      ships with time zone file version 32.

      Oracle recommends upgrading to the desired (latest) version of the time
      zone file.  For more information, refer to "Upgrading the Time Zone File
      and Timestamp with Time Zone Data" in the 19 Oracle Database
      Globalization Support Guide.

  6.  To identify directory objects with symbolic links in the path name, run
      $ORACLE_HOME/rdbms/admin/utldirsymlink.sql AS SYSDBA after upgrade.
      Recreate any directory objects listed, using path names that contain no
      symbolic links.

      Some directory object path names may currently contain symbolic links.

      Starting in Release 18c, symbolic links are not allowed in directory
      object path names used with BFILE data types, the UTL_FILE package, or
      external tables.

  7.  (AUTOFIXUP) Gather dictionary statistics after the upgrade using the
      command:

        EXECUTE DBMS_STATS.GATHER_DICTIONARY_STATS;

      Oracle recommends gathering dictionary statistics after upgrade.

      Dictionary statistics provide essential information to the Oracle
      optimizer to help it find efficient SQL execution plans. After a database
      upgrade, statistics need to be re-gathered as there can now be tables
      that have significantly changed during the upgrade or new tables that do
      not have statistics gathered yet.

  8.  Gather statistics on fixed objects after the upgrade and when there is a
      representative workload on the system using the command:

        EXECUTE DBMS_STATS.GATHER_FIXED_OBJECTS_STATS;

      This recommendation is given for all preupgrade runs.

      Fixed object statistics provide essential information to the Oracle
      optimizer to help it find efficient SQL execution plans.  Those
      statistics are specific to the Oracle Database release that generates
      them, and can be stale upon database upgrade.

      For information on managing optimizer statistics, refer to the 12.2.0.1
      Oracle Database SQL Tuning Guide.

  ORACLE GENERATED FIXUP SCRIPT
  =============================
  All of the issues in database PROD
  which are identified above as AFTER UPGRADE "(AUTOFIXUP)" can be resolved by
  executing the following

    SQL>@/home/oracle/preupgrade/postupgrade_fixups.sql
6. Run Pre-Upgrade Script
Prerequisites before running preupgrade_fixups.sql:
Verify Tablespaces Size For Upgrade through below query
==================================================
SQL>set line 1000
set pages 5000
col tablespace_name for a30
col file_name for a80
col free_space for 9999999
compute sum of total_space on report
compute sum of free_space on report
compute sum of MAX_SPACE on report
break on tablespace_name on report nodup

select c.tablespace_name,a.autoextensible,a.file_name,a.total_space,b.free_space, round(b.free_space/a.total_space *100,2) "Free%",a.max_space from (select file_id,file_name,sum(bytes)/1024/1024 total_space,sum(MAXBYTES)/1024/1024/1024 max_space,autoextensible from dba_data_files group by file_id,file_name,autoextensible) a,(select file_id,nvl(sum(bytes)/1024/1024,0) free_space from dba_free_space group by file_id) b, (select tablespace_name,file_id from dba_data_files) c where a.file_id=b.file_id(+) and a.file_id=c.file_id order by tablespace_name;


Check Invalid Object Count
===========================
SQL> select count(*) from dba_objects where status='INVALID';

  COUNT(*)
----------
         0


Gather Dictionary Stats
========================
SQL> SET ECHO ON;
SQL> SET SERVEROUTPUT ON;
SQL> EXECUTE DBMS_STATS.GATHER_DICTIONARY_STATS;

PL/SQL procedure successfully completed.


Purge Recyclebin
===================
SQL> PURGE DBA_RECYCLEBIN;

DBA Recyclebin purged.


Refresh Materialized Views
=========================
SQL> declare
list_failures integer(3) :=0;
begin
DBMS_MVIEW.REFRESH_ALL_MVIEWS(list_failures,'C','', TRUE, FALSE);
end;
/

PL/SQL procedure successfully completed.
Login in Database and run preupgrade_fixups.sql:
[oracle@prod ~]$ sqlplus / as sysdba

SQL*Plus: Release 12.2.0.1.0 Production on Tue Aug 22 20:27:05 2023

Copyright (c) 1982, 2016, Oracle.  All rights reserved.


Connected to:
Oracle Database 12c Enterprise Edition Release 12.2.0.1.0 - 64bit Production

SQL> SET ECHO ON;
SQL> SET SERVEROUTPUT ON;
SQL> @/home/oracle/preupgrade/preupgrade_fixups.sql
SQL> REM
SQL> REM    Oracle PRE-Upgrade Fixup Script
SQL> REM
SQL> REM    Auto-Generated by:       Oracle Preupgrade Script
SQL> REM                             Version: 19.0.0.0.0 Build: 1
SQL> REM    Generated on:            2023-08-22 20:24:44
SQL> REM
SQL> REM    Source Database:         PROD
SQL> REM    Source Database Version: 12.2.0.1.0
SQL> REM    For Upgrade to Version:  19.0.0.0.0
SQL> REM
SQL>
SQL> REM
SQL> REM    Setup Environment
SQL> REM
SQL> SET ECHO OFF SERVEROUTPUT ON FORMAT WRAPPED TAB OFF LINESIZE 200;
Executing Oracle PRE-Upgrade Fixup Script

Auto-Generated by:       Oracle Preupgrade Script
                         Version: 19.0.0.0.0 Build: 1
Generated on:            2023-08-22 20:24:44

For Source Database:     PROD
Source Database Version: 12.2.0.1.0
For Upgrade to Version:  19.0.0.0.0

Preup                             Preupgrade
Action                            Issue Is
Number  Preupgrade Check Name     Remedied    Further DBA Action
------  ------------------------  ----------  --------------------------------
    1.  dictionary_stats          YES         None.
    2.  pre_fixed_objects         YES         None.
    3.  tablespaces_info          NO          Informational only.
                                              Further action is optional.
    4.  rman_recovery_version     NO          Informational only.
                                              Further action is optional.

The fixup scripts have been run and resolved what they can. However,
there are still issues originally identified by the preupgrade that
have not been remedied and are still present in the database.
Depending on the severity of the specific issue, and the nature of
the issue itself, that could mean that your database is not ready
for upgrade.  To resolve the outstanding issues, start by reviewing
the preupgrade_fixups.sql and searching it for the name of
the failed CHECK NAME or Preupgrade Action Number listed above.
There you will find the original corresponding diagnostic message
from the preupgrade which explains in more detail what still needs
to be done.

PL/SQL procedure successfully completed.
7. Pre-Upgrade Prerequisites & create guranteed restore Point
Pre-Upgrade prerequisites
Note:
1. Archive Destination must have enough Space.
Validate Archivelog Mode
===========================
SQL> archive log list
Database log mode              Archive Mode
Automatic archival             Enabled
Archive destination            USE_DB_RECOVERY_FILE_DEST
Oldest online log sequence     41
Next log sequence to archive   43
Current log sequence           43


Check db_recovery_file_dest_size & Increase it if required
===============================================
SQL> show parameter recovery;

NAME                                 TYPE        VALUE
------------------------------------ ----------- ------------------------------
db_recovery_file_dest                string      /u01/app/oracle/fast_recovery_
                                                 area/PROD
db_recovery_file_dest_size           big integer 8016M
recovery_parallelism                 integer     0
remote_recovery_file_dest            string


Increase the size of db_recovery_file_dest_size
=========================================
SQL> alter system set db_recovery_file_dest_size=15G scope=both;

System altered.


Check db_recovery_file_dest_size
================================
SQL> show parameter recovery;

NAME                                 TYPE        VALUE
------------------------------------ ----------- ------------------------------
db_recovery_file_dest                string      /u01/app/oracle/fast_recovery_
                                                 area/PROD
db_recovery_file_dest_size           big integer 15G
recovery_parallelism                 integer     0
remote_recovery_file_dest            string
Create Flashback Guaranteed Restore Point
Note:
1. NO need to Enable Flashback Database from 11.2.1.0.1 onwards
2. Archive Log mode should be On
3. Compatible Parameter should be of current version
Flashback On Status
=====================
SQL> select flashback_on from v$database;

FLASHBACK_ON
------------------
NO


Archive Log Mode Check
========================
SQL> select name,open_mode,log_mode from v$database;

NAME      OPEN_MODE            LOG_MODE
--------- -------------------- ------------
PROD      READ WRITE           ARCHIVELOG


Compatible Parameter of Current version
====================================
SQL> show parameter compatible

NAME                                 TYPE        VALUE
------------------------------------ ----------- ------------------------------
compatible                           string      12.2.0
noncdb_compatible                    boolean     FALSE


Check for any previous restore Point
=================================
SQL> select * from V$restore_point;

no rows selected


Create FlashBack Guarantee Restore Point
====================================
SQL> create restore point pre_upgrade guarantee flashback database;

Restore point created.


Check Restore Point Details
==========================
SQL> col name for a20
col GUARANTEE_FLASHBACK_DATABASE for a10
col TIME for a60
set lines 190
select NAME,GUARANTEE_FLASHBACK_DATABASE,TIME from V$restore_point;

NAME                                GUARANTEE                                      TIME
-------------------- ---------- ------------------------------------------------------------
PRE_UPGRADE                         YES                      22-AUG-23 11.55.27.000000000 PM
8. Upgrade Database with Database Upgrade Assistant(DBUA)
Run dbua from 19c Home:
[oracle@prod ~]$ /u01/app/oracle/product/19c/db_1/bin/dbua
Database upgrade has been completed successfully, and the database is ready to use.
9.Validate Upgrade & Run Post-upgrade Script
Validate Upgrade
Verify /etc/oratab
===================
[oracle@prod ~]$ cat /etc/oratab | grep -i PROD

PROD:/u01/app/oracle/product/19c/db_1:N


Verify Time Zone
==================
SQL> SELECT version FROM v$timezone_file;

   VERSION
----------
        32


Check Invalid Objects
================
SQL> select count(1) from dba_objects where status='INVALID';

  COUNT(1)
----------
         0


Verify DB Version
====================
SQL> select name,open_mode,version from v$database,v$instance;

NAME      OPEN_MODE            VERSION
--------- -------------------- -----------------
PROD      READ WRITE           19.0.0.0.0


Verify DBA_REGISTRY
====================
SQL> col COMP_ID for a10
col COMP_NAME for a40
col VERSION for a15
set lines 180
set pages 999
select COMP_ID,COMP_NAME,VERSION,STATUS from dba_registry;

COMP_ID    COMP_NAME                                VERSION         STATUS
---------- ---------------------------------------- --------------- --------------------------------------------
CATALOG    Oracle Database Catalog Views            19.0.0.0.0      VALID
CATPROC    Oracle Database Packages and Types       19.0.0.0.0      VALID
JAVAVM     JServer JAVA Virtual Machine             19.0.0.0.0      VALID
XML        Oracle XDK                               19.0.0.0.0      VALID
CATJAVA    Oracle Database Java Packages            19.0.0.0.0      VALID
APS        OLAP Analytic Workspace                  19.0.0.0.0      VALID
RAC        Oracle Real Application Clusters         19.0.0.0.0      OPTION OFF
XDB        Oracle XML Database                      19.0.0.0.0      VALID
OWM        Oracle Workspace Manager                 19.0.0.0.0      VALID
CONTEXT    Oracle Text                              19.0.0.0.0      VALID
ORDIM      Oracle Multimedia                        19.0.0.0.0      VALID
SDO        Spatial                                  19.0.0.0.0      VALID
XOQ        Oracle OLAP API                          19.0.0.0.0      VALID
OLS        Oracle Label Security                    19.0.0.0.0      VALID
DV         Oracle Database Vault                    19.0.0.0.0      VALID

15 rows selected.
Run Post-Upgrade Script
Login in SQL & run: @/home/oracle/preupgrade/postupgrade_fixups.sql
SQL> @/home/oracle/preupgrade/postupgrade_fixups.sql

Session altered.


PL/SQL procedure successfully completed.


PL/SQL procedure successfully completed.


PL/SQL procedure successfully completed.


Package created.

No errors.

Package body created.


PL/SQL procedure successfully completed.

No errors.

Package created.

No errors.

Package body created.

No errors.
Executing Oracle POST-Upgrade Fixup Script

Auto-Generated by:       Oracle Preupgrade Script
                         Version: 19.0.0.0.0 Build: 1
Generated on:            2023-08-22 23:58:37

For Source Database:     PROD
Source Database Version: 12.2.0.1.0
For Upgrade to Version:  19.0.0.0.0

Preup                             Preupgrade
Action                            Issue Is
Number  Preupgrade Check Name     Remedied    Further DBA Action
------  ------------------------  ----------  --------------------------------
    3.  old_time_zones_exist      YES         None.
    4.  dir_symlinks              YES         None.
    5.  post_dictionary           YES         None.
    6.  post_fixed_objects        NO          Informational only.
                                              Further action is optional.

The fixup scripts have been run and resolved what they can. However,
there are still issues originally identified by the preupgrade that
have not been remedied and are still present in the database.
Depending on the severity of the specific issue, and the nature of
the issue itself, that could mean that your database upgrade is not
fully complete.  To resolve the outstanding issues, start by reviewing
the postupgrade_fixups.sql and searching it for the name of
the failed CHECK NAME or Preupgrade Action Number listed above.
There you will find the original corresponding diagnostic message
from the preupgrade which explains in more detail what still needs
to be done.

PL/SQL procedure successfully completed.


Session altered.
10. Drop Restore Point & Change Compatible Parameter
Drop Restore Point
You Must drop restore point before changing the Compatible Parameter. As you cannot revert back once parameter is changed.
Check restore point name & details
===============================
SQL> col name for a20
col GUARANTEE_FLASHBACK_DATABASE for a10
col TIME for a60
set lines 190
select NAME,GUARANTEE_FLASHBACK_DATABASE,TIME from V$restore_point;

NAME                 GUARANTEE_ TIME
-------------------- ---------- ------------------------------------------------------------
PRE_UPGRADE          YES        22-AUG-23 11.55.27.000000000 PM


Drop Restore Point
==================
SQL> drop restore point PRE_UPGRADE;

Restore point dropped.


Validate
=============
SQL> select NAME,GUARANTEE_FLASHBACK_DATABASE,TIME from V$restore_point;

no rows selected
Change Compatible Parameter
Important: If the value of the COMPATIBLE parameter is changed to 19.0.0 then if for some reasons database needs to be downgraded to 12.2.0 we would not have any option other than export/import to downgrade the database. We can easily downgrade the database if for some reason it has to be downgraded to lower version before changing the COMPATIBLE parameter. That’s why it is recommended to change COMPATIBLE parameter once you are fully sure Upgraded database is performing well.
Check Current Compatible value
=================================
SQL> show parameter COMPATIBLE

NAME                                 TYPE        VALUE
------------------------------------ ----------- ------------------------------
compatible                           string      12.2.0
noncdb_compatible                    boolean     FALSE


Change Compatible value to upgrade version
========================================
SQL> ALTER SYSTEM SET COMPATIBLE = '19.0.0' SCOPE=SPFILE;

System altered.


Restart Database
==============
SQL> shut immediate;
Database closed.
Database dismounted.
ORACLE instance shut down.


SQL> startup
ORACLE instance started.
Total System Global Area 2516581464 bytes
Fixed Size                  8899672 bytes
Variable Size             536870912 bytes
Database Buffers         1962934272 bytes
Redo Buffers                7876608 bytes
Database mounted.
Database opened.


Validate Compatible Parameter value
==================================
SQL> show parameter COMPATIBLE

NAME                                 TYPE        VALUE
------------------------------------ ----------- ------------------------------
compatible                           string      19.0.0
noncdb_compatible                    boolean     FALSE


Validate Database version
=========================
SQL> select name,open_mode,version from v$database,v$instance;

NAME                 OPEN_MODE            VERSION
-------------------- -------------------- ---------------
PROD                 READ WRITE           19.0.0.0.0
Take Fresh Backup of Upgraded Database
Conclusion
Upgrading Oracle Database 12c to 19c is a vital task to stay up-to-date with the latest features and security enhancements. By following these steps and carefully preparing and executing the upgrade, you can ensure a smooth transition and reap the benefits of improved performance and functionality in Oracle Database 19c. Always refer to the official Oracle documentation and seek professional assistance if needed to ensure a successful upgrade process.
Comments
Post a Comment